How to Use a Safety Razor: Step by Step
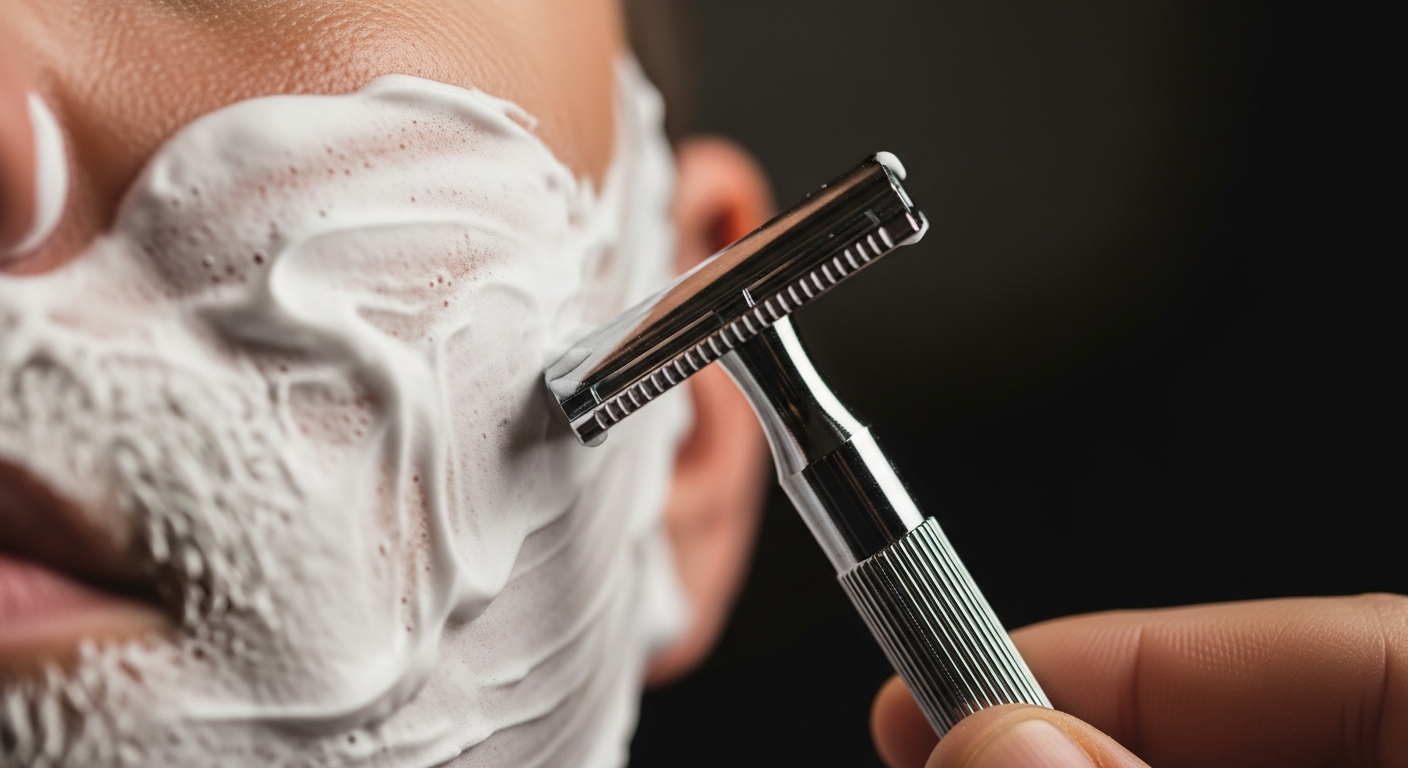
Hold the razor at roughly 30 degrees to your skin, use zero downward pressure, and shave with short strokes following your hair growth direction. That three-part rule covers most of what separates a clean shave from a bloody one. Master those fundamentals and the rest of the technique falls into place within a week or two.
Wet shaving communities on r/wetshaving and Badger & Blade have tracked beginner journeys for years. The consensus is consistent: pressure and angle errors account for the overwhelming majority of nicks, weepers (pinpoint blood dots from surface cuts), and razor burn in the first month.
Shavory earns a commission from qualifying purchases made through product links on this page. This does not affect our editorial assessments.
Prep: What You Do Before the Razor Touches Your Face
Shave after a hot shower, or spend 60-90 seconds pressing a warm, wet towel against your face. Hot water swells the hair shaft and softens the cuticle (the outer protective layer of each hair), reducing the force needed to cut cleanly. Dry-face shaving with a safety razor produces a very different result than wet-face shaving with the same razor and blade.
Splash your face with warm water again right before you build the lather. Your skin should feel warm and hydrated going into the first pass, not cold and dry.
Loading the Brush and Building Lather
Soak a badger or synthetic brush in warm water for 30-60 seconds, then shake out most of the excess. Load the brush by working it in small circles on a shave soap puck for 20-30 seconds, or squirt a small amount of shave cream (about the size of a large almond) into the brush tips.
Build the lather on your face, not in a bowl, if you are new to this. Work the brush in circles and then painting strokes until the lather is thick, glossy, and stands up on its own. Thin, watery lather means you need more product or less water in the brush. The lather acts as both lubricant and a signal layer: you can see exactly where you have already shaved.
For a deeper look at brush types before you buy, the beginner’s guide to wet shaving covers the full kit from scratch.
Mapping Your Grain
Run a fingertip across a dry patch of your jaw. The direction that feels roughest is against the grain; the direction that slides smoothly is with the grain. Most men grow downward on the cheeks and outward on the neck, but grain patterns vary significantly, and the neck in particular often changes direction mid-patch.
Map each zone before your first shave. You will use this map to sequence your passes and to know exactly where going across or against the grain will hit sensitive skin. The cheeks are usually the most forgiving zone. The upper lip, chin, and neck demand more care because the grain is less uniform and the skin sits over more irregular surfaces.
Take two minutes on this before you ever pick up the razor. Grain mapping is a one-time investment that pays off every single shave, especially on the neck where many beginners get their worst irritation. Sharpologist, a publication focused exclusively on traditional wet shaving, has long cited grain awareness as the most overlooked variable in beginner technique.
Blade Angle: Finding the 30-Degree Sweet Spot
Place the top cap of the razor flat against your cheek, handle pointing straight out from your face at 90 degrees. From that position, slowly drop the handle until the blade just starts to contact the skin. That angle, somewhere between 25 and 35 degrees for most razors, is where you want to shave.
Too steep (handle too low, near parallel with your face) and the blade scratches without cutting. Too shallow (handle too high, closer to perpendicular) and the blade digs in aggressively. Both produce irritation. The Merkur 34C and Edwin Jagger DE89 have geometry that naturally guides most users into the right angle range, which is why they appear constantly in beginner recommendations on Sharpologist and Badger & Blade. The Rockwell 6S with its milder numbered plates gives you an additional margin of error while you learn angle control.
Comparing models side by side before you buy? The best safety razor roundup covers specs, aggressiveness, and price ranges across all three.
| Razor | Aggressiveness | Angle Forgiveness | Price Range | Best For |
|---|---|---|---|---|
| Merkur 34C | Mild-medium | High | $35-45 | First razor, sensitive skin |
| Edwin Jagger DE89 | Mild | High | $30-40 | First razor, fine to medium beard |
| Rockwell 6S | Adjustable (1-6) | Very high | $75-90 | Beginners who want long-term flexibility |
No Pressure: Let the Weight Do the Work
This is the single hardest habit to build if you are switching from a cartridge razor. Cartridge razors require pressure to get the blades to engage. Safety razors do not. The head is weighted, the blade is exposed, and the geometry does the cutting when you simply guide the razor across your skin.
Hold the handle near the bottom end with loose fingers. If you feel your fingertips going white from gripping, or if you are consciously pushing the head into your face, you are applying too much pressure. Razor burn from a safety razor is almost always a pressure problem, not a blade problem.
A useful test: hold the razor between just your thumb and index finger, pinching lightly near the base of the handle. If it feels like the razor might slip, that is roughly the right grip tension. You are not gripping a pen or a hammer. The razor’s weight alone is what does the work once your angle is set correctly. Most beginners solve 80% of their irritation problems simply by loosening their grip.
The Multi-Pass System: Step by Step
- First pass: with the grain (WTG). Short strokes, 1-2 inches maximum. Rinse the blade under running water after every 2-3 strokes. Work methodically: one cheek, then the other, then upper lip, then chin, then neck. Do not chase a closer shave on this pass. Your only goal is to reduce bulk.
- Rinse and relather. Rinse your face with warm water, pat gently, and apply a full second lather. Never run a second pass over dry skin or dried lather.
- Second pass: across the grain (XTG). Shave at 90 degrees to the direction you just shaved. On cheeks that means shaving horizontally rather than downward. This pass removes most of the remaining stubble and gets most men to a daily-shave-good result.
- Rinse and relather again if doing a third pass. Same process as before. Do not skip this step.
- Third pass: against the grain (ATG), optional. Skip this entirely for your first 2-3 weeks. ATG on unprepared skin or with any technique errors produces irritation fast. Once you have WTG and XTG dialled in with no weepers, introduce ATG carefully on less sensitive areas like the cheeks before attempting the neck.
- Final rinse with cold water. Cold water closes pores and reduces inflammation. Spend 20-30 seconds rinsing thoroughly.
- Alum block or aftershave. Wet an alum block and rub it across your face. It will sting on any micro-cuts and help seal them. Let it sit for 30 seconds, then rinse off. Follow with an aftershave balm or splash depending on your skin type. Dry or sensitive skin benefits more from a balm; normal or oily skin tolerates a splash well.
Common Beginner Mistakes That Cause Irritation
Too much pressure. Already covered above, but worth repeating: this is the most common cause of razor burn and weepers in the first month. If you are getting consistent irritation, lighten your touch before you change anything else.
Wrong angle. Shaving too steeply drags the edge. If the razor is chattering or tugging rather than gliding, drop the handle slightly and feel for the sweet spot again.
Using a dull blade. Safety razor blades should be replaced every 3-7 shaves depending on your beard density and the blade brand. A dull blade requires more pressure to cut, which creates exactly the irritation you are trying to avoid. Feather, Astra SP, and Gillette Silver Blue are frequently cited on r/wetshaving as consistent performers with predictable longevity.
Going ATG too early. ATG gives a closer result but punishes any technique error. Get your WTG and XTG passes clean before adding it.
Insufficient prep. Cold, dry skin, or inadequate lather coverage, makes every other variable worse. Prep is not optional.
Skipping the relather between passes. Running a second pass over dried lather or bare skin is one of the fastest ways to get razor burn. Each pass needs fresh lather, full stop. Many beginners skip this step to save time and pay for it with a day of irritated skin.
If razor burn is already an issue, the detailed breakdown on how to prevent razor burn covers treatment, recovery, and long-term technique fixes.
What to Expect in the First Two Weeks
The first three or four shaves will feel unfamiliar and slow. That is normal. You are building new muscle memory for angle and pressure control, and that takes repetition. Most users on r/wetshaving report the technique clicking somewhere between shave five and shave ten.
Small weepers on the first couple of shaves are not a failure. They mean you are cutting at the right depth and the technique just needs refining. Significant burning or multiple cuts usually point to pressure or angle errors rather than a product issue.
The guides hub has additional technique resources as you move from basic competence toward a genuinely great daily shave.
Frequently Asked Questions
What angle should I hold a safety razor?
The target is around 30 degrees between the blade and your skin, though the exact sweet spot varies slightly between razor models. Start with the cap flat against your cheek and drop the handle until the blade contacts the skin. That natural drop point is your starting angle. Adjust from there based on whether the razor is cutting cleanly or skipping.
How much pressure should I use with a safety razor?
Almost none. Let the weight of the razor head do the cutting. You are guiding the razor, not pushing it into your face. If you are consciously pressing down, you are applying too much pressure. This single habit change resolves most razor burn problems beginners experience.
How many passes should I make with a safety razor?
Two passes (with-grain then across-grain) get most people to a close, comfortable result. A third against-the-grain pass is optional and should only be added once the first two passes are consistently clean and irritation-free. Beginners should stick to one or two passes for the first few weeks.
How often should I change safety razor blades?
Every 3 to 7 shaves is the typical range. Thicker, coarser beards wear blades faster. A blade that is pulling or tugging rather than gliding cleanly needs to be replaced. Blades are cheap enough that there is no value in stretching them past their useful life. Most experienced wet shavers replace after 4-5 shaves as a baseline.
Can I shave against the grain with a safety razor?
Yes, but not until you have the technique under control. Against-the-grain shaving gives the closest result but amplifies any pressure or angle errors, which produces irritation quickly on unprepared skin. Get at least two to three weeks of clean with-grain and across-grain shaving before adding an ATG pass, and even then introduce it on less sensitive zones first.
Do I need a shaving brush to use a safety razor?
No, but it helps significantly. A brush builds richer lather, lifts hairs away from the skin, and distributes soap evenly. Many beginners start with a brush and a puck of shave soap because the combination produces better lather than canned foam with less product cost per shave. A brush is an upgrade, not a requirement.